Back in 2011, both rear power windows of my 2001 BMW 323xi stopped working within 1 month of each other. In the same year, my father's 2001 Lincoln LX also had 2 power window regulator broken. It was amazing at the time how windows simply broke left and right. I was too cheap and too lazy to replace them. I bought some power suction grips from Bed Bath & Beyond to keep the glass up without falling. I have a child seat in the back, so most people thought I had the grips for my toddler. LOL. Incredibly, the suction solution has been working well for over 2 years now.
Earlier this year, the front driver side power window regulator broke as well. So now I had 3 power suctions on 3 of my 4 windows. It's now looking ridiculous. After a few months of procrastination, I finally got around and got the DIY project going today.
The project took me over 3 hours to complete partly because I let my 6 year old participate, but really, I ran into 3 problems that took me a lot longer than expected. If nothing else, these are the take-aways from this article:
- One bolt off the window glass got stripped/rounded and I couldn't loosen it. It was my worse fear after reading a few DIY forum posts before I started the project. I went to a nearby Home Depot and bought a new set of ratchet sockets -- it was a wishful thinking but it came true - it turned out it was the cheap socket that got rounded, NOT the bolt itself!
- It was difficult to slide the glass back onto the (new) regulator brackets such that the bolts on the glass fit snugly onto them. It must have taken me 20 minutes just for this step and a lot of sweat and cut on the hands to finally get the glass fastened properly onto the regulator brackets.
- Just about all DIY forums failed to mention this, but the motor has a range. Chances are, the motor range and the current window glass / regulator brackets position are out of sync. The result is that you cannot raise the window all the way up before reaching the end of the motor's range. So after fastening the window glass to the new regulator, I had to lower the glass all the way down, remove the motor from the regulator, push the switch so the motor stoped at the lower range, and finally put the motor back onto the regulator.
There are a number of DIY on this topic on the web, but I'd like to document for my own record, as well as for anyone who needs another reference and comparing notes.
Tools You Will Need
- Non-marring prying tool, or a super thin flat-head screw driver
- 8 mm and 10 mm sockets, ratchet drive, AND extension
- Torx t-20 and Torx t-30 drivers or bits
- Optional WD-40
- Optional hair dryer
Replacement Part
I've read solutions on the web using zip ties, but I tend to shun these ideas. They would apply to the front windows only. The zip-ties would probably wear out sooner. And you can get a brand new replacement for $26.50 on eBay. I'd choose to replace the regulator.
Steps
|
| Carefully pry and pop out the side mirror switch from the door arm rest. Remove the screw using Torx t-20 driver. |
|
| Carefully pry and pop out the tabs from the underside of the door arm rest. Remove the 2 screws using a Torx t-20 driver. |
|
| Carefully pry and pop out the wood trim. Note the 4 tab positions so you can confidently apply prying force. |
|
| Remove the 2 screws indicated using a Torx t-20 driver. Note the front screw is much longer than the rear. |
|
| Yank out the door panel with force beginning from the top. Note the indicated locations. |
|
| Here are all the tab locations shown after the door panel is yanked out completely. But before the door panel is completely removed, we need to disconnect a few things... |
|
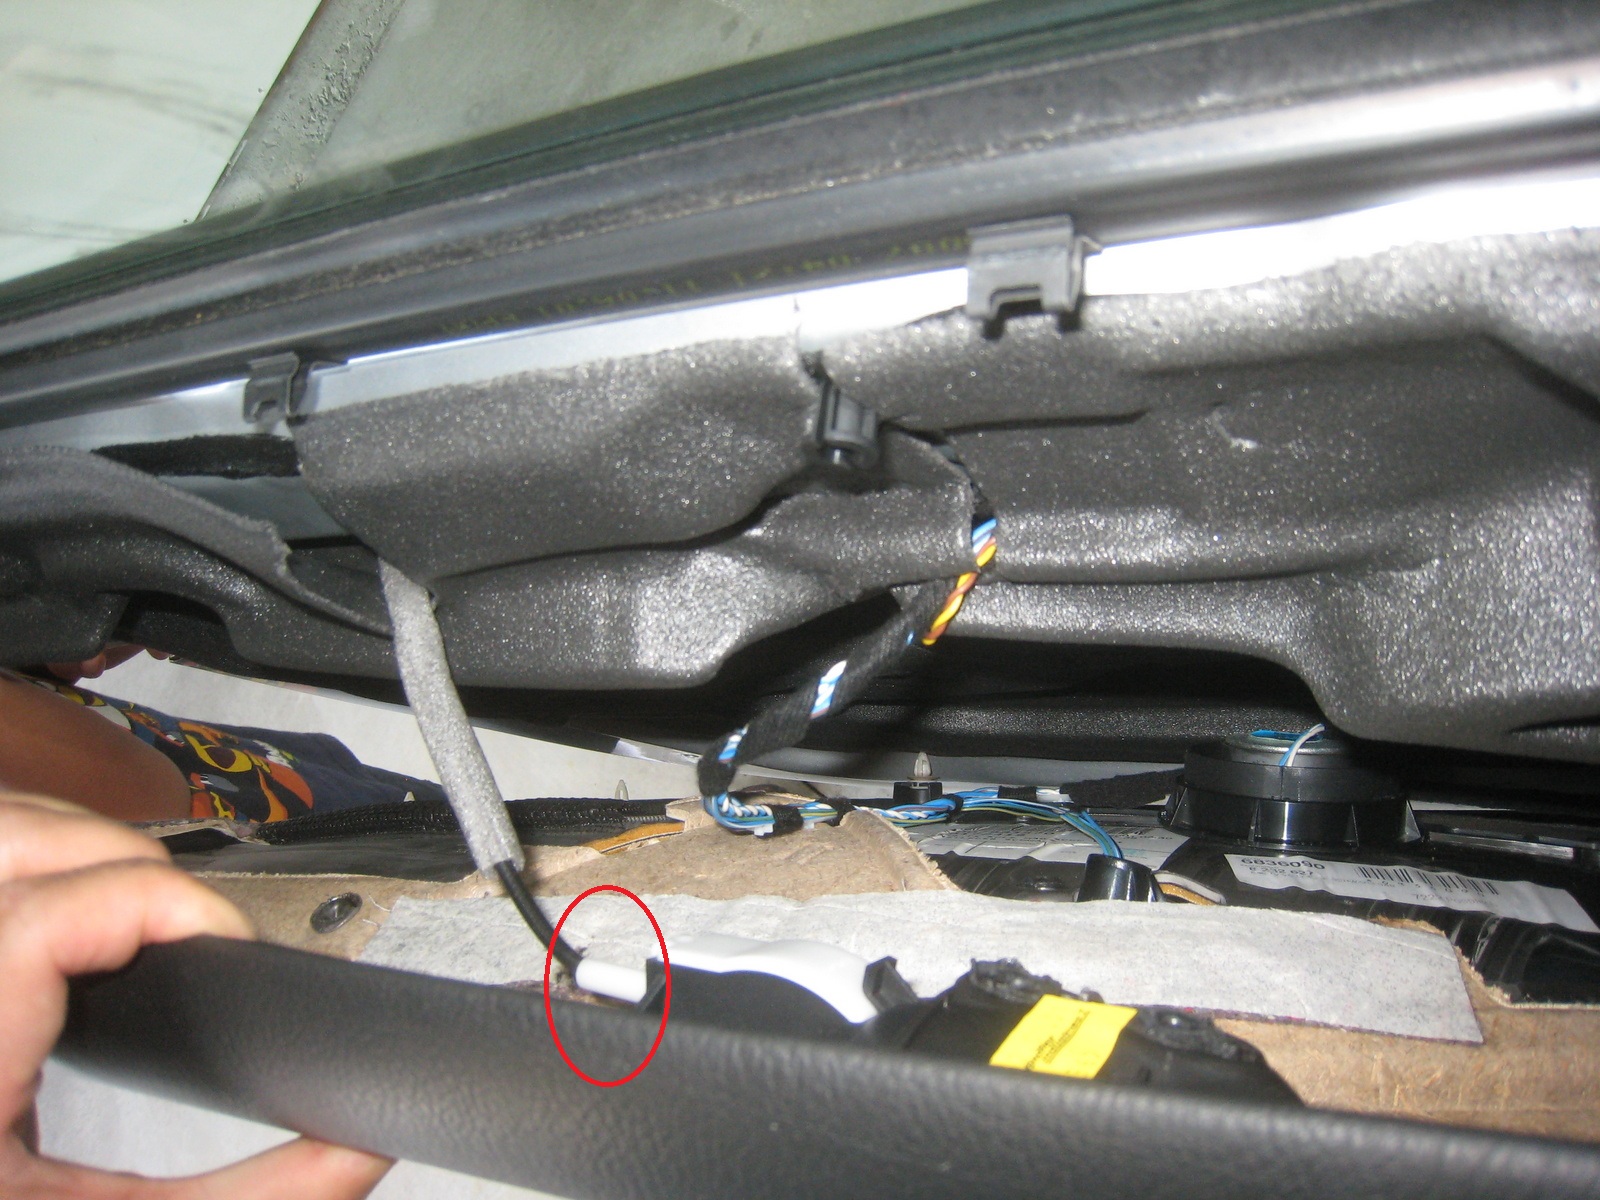
| Yank out the door handle cable by grabbing the circled area and pull away from the door panel. |
|
| Disconnect the 2 speaker cable clips, and pull out the cable securing clip. |
|
| Disconnect the cable socket from the side mirror switch. After this step, the door panel can then be completely removed. |
|
| Remove the 2 screws from this module using a Torx t-20 driver. |
|
| Disconnect the negative terminal off the battery before continuing!!! Remove the 3 nuts from the air bag module using 10 mm socket. |
|
| Ensure the battery is disconnected, then remove the cable connector from the air bag module. This step is a bit tricky. You need to use a very thin flat head screw driver and first pry loose the top tab as indicated by (1) by elevating it, and then pry loose the base as indicated by (2). |
|
| Here is a closer look at the connector after removal. You can see the top tab is showing a gap from the rest of the connector. |
|
| At this point, it should taken no more than 30 minutes for the above easy steps. |
|
| Carefully remove the vapor barrier. Use screw driver or other object to separate/cut the goo. Don't use your hands; it can get messy. |
|
| It's a bit painful and may take 5 minutes to detach the vapor barrier. The good news is, putting it back is much easier. |
|
| Temporarily connect the air bag module and reattach the negative terminal to the battery so that you can lower the window regulator using the power window switch. You want the 2 bolts fastened to the window glass become visible at the locations indicated. See the approximate height of the glass to achieve this. |
|
| Using a 8 mm socket with extension to loosen the bolt. This is where you want to be VERY careful. Before you apply any force, make sure the socket is flush to the bolt which has rather shallow clearance. Pray hard that you don't strip/round the bolt! Some WD-40 should also help. |
|
| Do the same for the other bolt. Note how the bolt is secured between the red tab and the metal bracket because you're going to have to put it back the same way and it won't be easy. The bolt and the red tab is secured with the glass, while the metal bracket is part of the regulator that moves up and down with the cable. After both bolts are loosened, lift the glass all the way up to be out of the way, and secure it however you can -- in my case, I have the power grip :) |
|
| Detach the negative terminal of the battery and remove the airbag as before. Remove the motor by first unplugging the electric cable, removing the 3 Torx t-30 screws, then twist counter-clockwise so the 3 prongs of screw socket clears the regulator bracket. You can also remove the motor after removing the whole regulator apparatus like I did, but in hindsight, I think removing the motor first would give you more room. |
|
| Squeeze the cable securing tab indicated with blue circle and push in to release it. Next, remove the regulator apparatus buy taking out the rear bar first. Again, I think if the motor had been removed first, this step would have been a bit easier. |
|
| This is what the original regulator (with motor still attached) looks like as it comes out. Retrieve the cable securing tab as indicated. The replacement part won't come with one. |
|
| This is the back view of the original regulator. Note the circled parts are where the bolts at the bottom of window glass get attached to the regulator. |
|
| Flipping the bracket from the cable and you can see that the housing for the metal cylinder on the cable is broken. |
|
| In fact, both housings were broken. I managed to find one of the broken pieces. |
|
| If you did not remove the motor before removing the regulator, remove it now by first unplugging the electric cable, removing the 3 Torx t-30 screws, then twist counter-clockwise so the 3 prongs of screw socket clears the regulator bracket. |
|
| This is the $21.50 replacement I bought from eBay. Put the front bar in first, then the rear bar. |
|
| Hang the regulator by inserting its protruding bolts into the 5 holes as indicated. Attach the motor, airbag, and the negative terminal of the battery so by operating the windows switch you can move the brackets of the new regulator to the same place where you could see the bolts on the window glass when you loosened them before. |
|
| Now the time consuming part. You need to manually lower the window glass so that each set of red plastic tab and the bolt of the window glass snugly sandwiches the metal bracket of the regulator. Tighten the bolts carefully without stripping them. You would most likely need to sync the motor range with the regulator position as mentioned earlier. |
|
|
Finally, put everything back in reverse order. The only things I might add is that it may not be a bad idea to use a hair dryer to heat up the vapor barrier after you put it back on to make it stick nicely. Also, you'd have to bang hard on the door panel to drive all the tabs and latches in.
Good luck with your own DIY projects!
 I use a dozen of Google products daily for years, including making phone calls using Gmail's Call Phone. I have had quite a few problems and issues with Google products, but amazingly Google has never ever address any of them, including this one which I will address.
 problem but no one has the solution. I then noticed that my family are in my Google+ circles and their Google profiles are automatically appended in Google Contacts. May be that's why? But one family member who is in my Google+ circle does show up on the keypad... Soon I found a pattern, and thus the solution. Ready?